New Workflow
The Workflow feature enables automating company processes. You can start creating a new workflow by highlighting the Workflows heading in the left-side tree view of M-Files Admin and selecting New Workflow... on the task area.

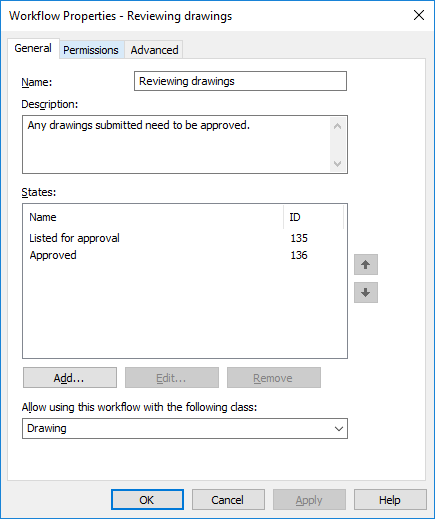
The properties dialog for a workflow.
Name
Give a descriptive name for the workflow.
Description
A free-form description of the workflow.
States
Allow using this workflow with the following class
You can allow a given workflow to be used with all classes or with one class only. For example, you can define that the Purchase Invoice Approval workflow can be selected for documents in the Purchase Invoice class only. The workflow will in that case not be selectable for documents in any other class.
The Permissions tab
Access for viewing this workflow can be set on the Permissions tab. If the user does not have access for viewing the workflow, also the workflow states are hidden.
The Advanced tab
From the Advanced tab, you can define an alias for the workflow. For more information, see Associating the Metadata Definitions.
Creating a New Workflow
Steps
Results
- For instructions on adding workflow states to a workflow, see Adding States to a Workflow.
- For instructions on adding state transitions between states in a workflow, see Adding State Transitions to a Workflow.