How do I migrate my document vaults to a new server?

Note: This content is no longer updated. For the latest content, please go to the user guide for M-Files Online. For information on the supported product versions, refer to our lifecycle policy.

When migrating document vaults to a new server, use the same version of M-Files on both the old and the new server. If you need to upgrade M-Files in conjunction with the migration, upgrade M-Files on the new server only after the migration is complete and you have verified that the document vaults are functional on the new server.

Migrating document vaults to a new server when using Firebird as the database engine

If your document vaults use Firebird, complete the following steps to migrate the vaults to a new server:

  1. Make sure there are no documents checked out on any workstation.
    You may create a view that contains all the documents that are currently checked out in the vault by using the Checked out status filter for a view.

    For instructions on specifying a view, see Creating a View.

  2. Take the vaults offline.
    For instructions, see Taking a Vault Offline.
  3. Back up the master database and copy the backup file to the new server computer.
    For instructions, see Backing Up the Master Database.
  4. Take full backups of your document vaults and copy the backup files to the new server computer.

    The backup files contain file data regardless of whether the file data is stored in the default location, or in a separately specified location, so there is no need to copy the file data separately.

    For instructions, see Backing Up a Document Vault.

  5. Install M-Files to the new server computer:
    1. In the M-Files Setup wizard, click Next, select I accept the license agreement, and then click Next again.
    2. Select the Evaluation installation option.
      By selecting the Evaluation installation option, you do not have to install a license on the new server because the existing license is taken into use when you restore the master database.
    3. Complete the installation.
  6. Open M-Files Admin on the new server computer.
  7. Restore the master database.
    For instructions, see Restoring the Master Database.
  8. Restore the document vaults from the backups using the option Restore using original identity.

    Pay attention to file data locations when restoring the vaults. If in doubt, check the settings on the old M-Files server.

    For instructions, see Restoring a Document Vault.

  9. Copy the search indexes from the old server computer to the new one:
    1. In M-Files Admin, in the left-side tree view, right-click a vault and select Properties.
    2. Open the Advanced tab, and then click Define.

      By default, the Indexes folder can be found under the location specified in the Location for vault data on server field.

      In larger vaults, the search indexes might be placed in an alternate location. Check the index location according to the instructions in How do I check the location of the active search indexes?.

    3. Copy the Indexes folder to the new server for each vault that you want to migrate.
  10. Optional: Specify notification settings if you wish to enable notifications.
  11. Specify backup jobs and update the backup file locations if necessary.
    For instructions, see Scheduled Backup Jobs.
  12. Stop and disable the M-Files Server service on the old server computer to make sure no users accidentally connect to it in the future.
  13. Either:
    • If you are using a DNS alias for your M-Files Server, update the alias to point to the new server computer. This way you do not have to distribute new vault connection settings to client computers.
      or
    • Edit the document vault connection settings on the client computers so that they connect to the new server address. For instructions, see Adding a Vault Connection.
  14. Make sure that any external systems that point towards M-Files use either the DNS alias, or the DNS name or IP address of the new M-Files server.
  15. Disconnect the old server computer.

Migrating document vaults to a new server when using Microsoft SQL Server as the database engine

The instructions assume that Microsoft SQL Server is not changed during the migration. If Microsoft SQL Server is installed on the same computer as M-Files Server and therefore also requires migration, see Migrating the Vault Database from One Microsoft SQL Server to Another for further instructions. It does not matter whether you migrate M-Files Server before migrating the document vaults or the other way around.

If your document vaults use Microsoft SQL Server, complete the following steps to migrate the vaults to a new server:

  1. Make sure there are no documents checked out on any workstation.
    You may create a view that contains all the documents that are currently checked out in the vault by using the Checked out status filter for a view.

    For instructions on specifying a view, see Creating a View.

  2. Take the vaults offline.
    For instructions, see Taking a Vault Offline.
  3. Back up the master database and copy the backup file to the new server computer.
    For instructions, see Backing Up the Master Database.
  4. In Microsoft SQL Server Management Studio, take full backups of your document vaults as a precaution.
  5. If the file data is stored on the file system, complete the following steps:
    1. In M-Files Admin, in the left-side tree view, right-click a vault and select Properties.
    2. Open the Advanced tab and click Define.
    3. Click File Data Location.
      Result:The File Data Location dialog is opened.
    4. Click Define.
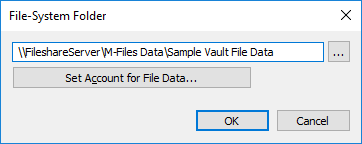
      Result:The File-System Folder dialog is opened.
    5. Using File Explorer or any other file managing application, copy the file data folders from the location shown in the File-System Folder dialog to the new server computer or network share.
  6. Attach the document vaults to the new server in M-Files Admin using the original identities of the vaults.
    If the file data is stored on the file system, make sure to specify the correct file data location when attaching the vaults.

    For instructions, see Attaching a Document Vault and Changing the Location of the Vault File Data.

  7. Copy the search indexes from the old server computer to the new one:
    1. In M-Files Admin, in the left-side tree view, right-click a vault and select Properties.
    2. Open the Advanced tab and click Define.

      By default, the Indexes folder can be found under the location specified in the Location for secondary data on the M-Files server field.

      In larger vaults, the search indexes might be placed in an alternate location. Check the index location according to the instructions in How do I check the location of the active search indexes?.

    3. Copy the Indexes folder to the new server for each vault that you want to migrate.
  8. Optional: Specify notification settings if you wish to enable notifications.
  9. Specify backup jobs and update the backup file locations if necessary.
    For instructions, see Scheduled Backup Jobs.
  10. Stop and disable the M-Files Server service on the old server computer to make sure no users accidentally connect to it in the future.
  11. Either:
    • If you are using a DNS alias for your M-Files Server, update the alias to point to the new server computer. This way you do not have to distribute new vault connection settings to client computers.
      or
    • Edit the document vault connection settings on the client computers so that they connect to the new server address. For instructions, see Adding a Vault Connection.
  12. Make sure that any external systems that point towards M-Files use either the DNS alias, or the DNS name or IP address of the new M-Files server.
  13. Disconnect the old server computer.

Additional configuration required for the classic M-Files Web

If M-Files Web is installed on the M-Files application server, you need to install Internet Information Services and M-Files Web on the new server computer after installing M-Files Server on the new server computer.

If M-Files Web is installed on a separate proxy server instead, the following steps must be completed.

  1. If you upgrade M-Files Server after migrating to a new server computer, upgrade the M-Files Web proxy server to the same M-Files version as the one you installed on the new application server.
  2. In the Microsoft Windows registry of the M-Files Web proxy computer, update the following setting to point to the new M-Files application server:
    Key HKEY_LOCAL_MACHINE\SOFTWARE\Motive\M-Files\<version>\Server\MFWA
    Value name Server
    Value type REG_SZ
    Value The DNS name of the M-Files application server.

Additional configuration required if you use RPC over HTTPS

On the RPC proxy computer, update the HOSTS file so that the server hostname (the one that clients use for connecting to the M-Files server) points to the IP address of the new M-Files application server.

For further information, see the document Enabling RPC over HTTPS Connections to M-Files Server.