Exporting content
You can use content exporting for long-term archiving of content, synchronization of data among several vaults, or freeing up disk space on the server.
Do the following steps to export content:
-
-
-
-
-
Select Content Replication and Archiving.
Result:The content replication and archiving features are displayed in the right-side pane.
-
Click the One-time Export... button.
For information about creating a recurring export operation, see Defining a scheduled export.Result:The Export Content dialog is opened.
-
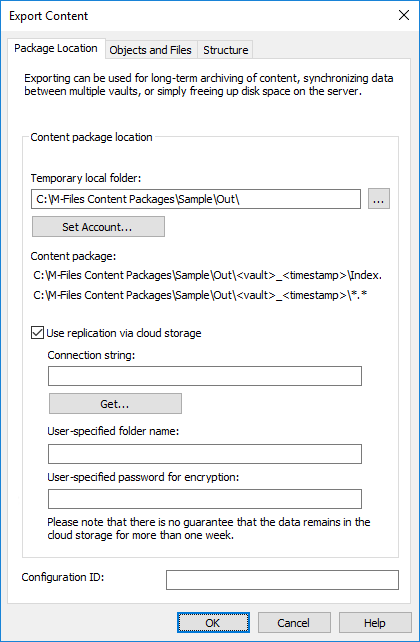
On the Package Location tab, define the location for the
content package.
- Optional:
Still on the Package Location tab, enable the
Use replication via cloud storage option to export to a
cloud storage location.
- Optional:
In the Configuration ID field, you can enter any string of
characters for identifying this replication job.
-
On the Objects and Files tab, select Export
objects and files and Export existing
objects.
For more information about the options on this tab, see Export objects and files.Note:
- Optional:
To define the conditions that objects must meet to be exported, select
Use a search filter and click the
Define button.
- In the Define Filter dialog, define the conditions that objects must meet to be exported and click OK once you have defined all the necessary conditions.
-
Click the Structure tab.
Result:The Structure tab is opened.
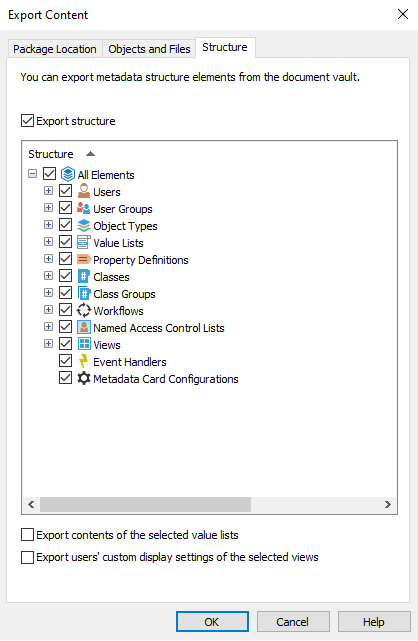
-
Enable the Export structure option and either:
- Check the All Elements option to export all
metadata structure elements.or
- Check individual metadata structure elements on the list to define individually the elements to be exported.
For more information about the options on this tab, see Export structure. - Check the All Elements option to export all
metadata structure elements.
-
Click OK to close the Export
Content dialog and to start the export.
Note: Make sure that the export operation is complete before you take any actions in the vault.