
Setting Up Push Notifications for the M-Files Mobile Apps
Push notifications allow sending notifications from M-Files Server to iOS and Android devices that have the M-Files mobile app installed. Push notifications are sent for the same events as email notifications except for digest messages. Once they are enabled, you will receive a push notification, for instance, when a new assignment is created for you. You can also create personalized notification rules with M-Files Desktop (see Editing Notification Settings in M-Files Desktop).
- in an on-premises environment or in your own cloud environment, follow the instructions provided in the sections Creating a notification hub in Azure, Setting up an Azure notification hub for push notifications, and finally Enabling push notifications in M-Files vaults.
- in M-Files Cloud, simply follow the steps from 9 to 16 under Enabling push notifications in M-Files vaults. No other changes are needed.
- Vault users should enable push notifications on their iOS or Android devices. They will receive push notifications when they are logged in to a vault that has push notifications enabled. Note that vault users do not have to keep the M-Files application running to receive push notifications from a vault, as long as they are logged in to the vault ensures that they can receive push notifications.
Before you begin, note that notifications need to be enabled on the M-Files server (see Editing Notification Settings in M-Files Admin).
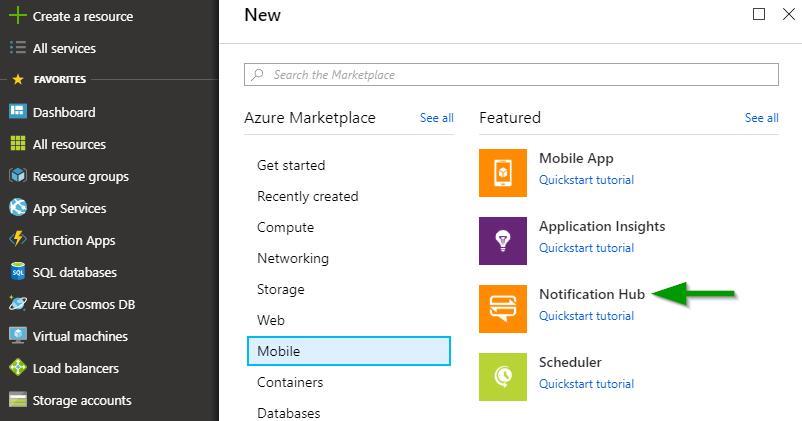
Creating a notification hub in Azure
Do the following steps to create a new notification hub in Azure:
-
Select .
Setting up an Azure notification hub for push notifications
After you have created an Azure notification hub, it needs to be configured for different mobile platforms. You can find the settings for the available notification services by doing these steps:
- Sign in to Azure Portal.
- Select All services.
- Under Mobile, select Notification Hubs.
- From the list of notification hubs, select the hub that was created according to the instructions in Creating a notification hub in Azure.
-
Under Notifications Settings, do one of the following, or
both:
- Enter the iOS configuration under Apple
(APNS). You can request the configuration settings from our
customer support at [email protected].or
- Enter the Android configuration under Google (GCM). You can request the configuration settings from our customer support at [email protected].
- Enter the iOS configuration under Apple
(APNS). You can request the configuration settings from our
customer support at [email protected].
Enabling push notifications in M-Files vaults
After you have created a notification hub and set it up for push notifications, you need to enable push notifications for the M-Files vaults in which you want them to be used, as well as to set up the connection between M-Files and the Azure notification hub. You can store the connection settings to the Windows registry of the M-Files server computer or set them separately for each vault via M-Files Admin, or both. The server-level settings simply do not apply to any vaults for which the connection settings have been defined via M-Files Admin.
First, you need to locate the connection details in your notification hub settings:
If you want to store the connection details to the Windows registry of the server computer, do the following steps:
To enable push notifications in a vault:
If the connection details have not been stored to the Windows registry of the server computer, or if you want to vault-specifically override the server-level settings, do the following:
Finalize the process by doing either step 19 or steps 20 and 21, depending on where the connection settings are stored. Note that restarting the vault or the server should always be done in a controlled manner and users should be notified beforehand so that no work is lost.