
Creating and Completing Assignments
Assignments transfer information and responsibility for task execution to the correct person. Assignments can be used, for instance, to request a colleague to look over a proposal before it is sent to the customer.
Assignments can be included in a workflow, or they can be independent. For more information on automatic assignments included in workflows, refer to Assign to user.
Video: Creating and Completing Assignments
To submit a new assignment, create a new Assignment object. Because assignments are objects, you can define the same assignment for several objects. Or, inversely, add several different objects to the same assignment. For example, you can assign several drafts to a colleague for inspection with a single assignment.
Because the assignments are separate objects, they have their own version history and permissions. For this reason, the document and assignment included in it can have separate permissions, and therefore only a user who has reading rights to the document can mark the assignment completed. The user does not need to have rights to edit the document, meaning that users with a read-only license to M-Files can also mark the assignment completed.
You have three ways to create an assignment:
- Create an assignment and add objects to it either by dragging and dropping or by using the Add File function from the context menu.
- Select one or more documents and select Assignment from the Create menu.
- Create an assignment without adding an object to it and define the entire task in the description field of the assignment.
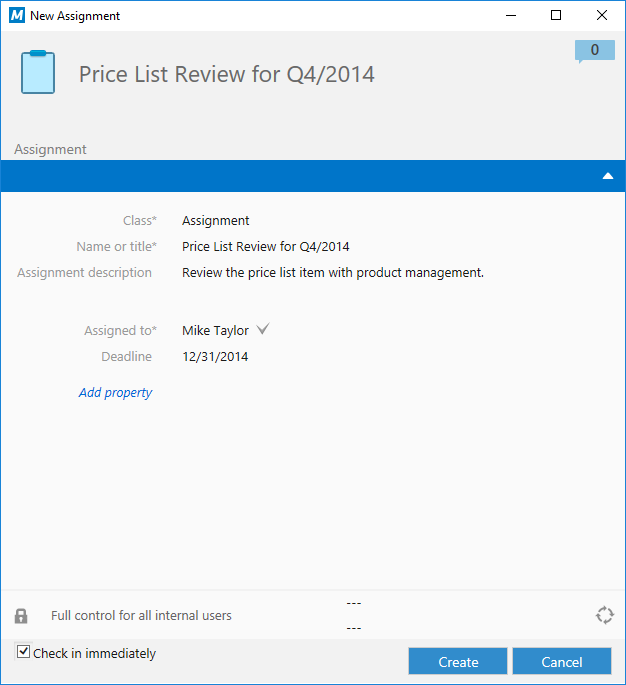
The metadata card for a new assignment.
Assignment description
Add a free-form description of the task. The assignment notice by email displays the description to the person to whom the task was assigned.
Assigned to
Select the persons you wish to assign the task to. You can add more users by clicking the plus button (+) on the toolbar. Whenever an assignment is a separate object, all persons to whom the task was assigned must mark the assignment as complete before it is switched to the "complete" state.
Deadline
If desired, you can select a deadline for the assignment. The user gets an automatic reminder if he has not marked the assignment as completed when the deadline is approaching. The reminder will be sent using a common notification rule which can be deleted by the administrator.
The deadline can also be useful for creating views. The administrator or user can create a view to display objects whose deadline is approaching. For more information about views, refer to Creating a View.
Monitored by
You can use the Monitored by field to define the users you wish to notify every time a task is marked as complete. The person submitting the assignment is automatically defined as a task monitor as soon as the object is saved for the first time. Once the property has been automatically or manually added to the metadata card, you can change or add more monitors by clicking the plus button (+) on the toolbar.
Mark as complete icon
You can mark the assignment complete by clicking the icon next to the Assigned to field.
Creating a New Assignment for an Existing Document
- In M-Files, locate the document for which you want to create a new assignment.
- Right-click the document and select from the context menu.
- In the Name or title field, enter a descriptive title for the assignment.
- In the Assignment description field, enter a detailed description of the assignment to ensure that the assignee is properly informed about the details of the assignment.
- From the Assigned to drop-down menu, select the person to whom this assignment is assigned to.
- Optional: In the Deadline field, select a deadline date by which the assignment must be completed.
- Optional: Via the workflow controls at the bottom of the New Assignment dialog, select a workflow for the assignment.
- Click Create to create the assignment.
Creating a New Assignment for a New Document
- In M-Files Desktop, click the Create button and select Assignment... from the context menu.
- In the Name or title field, enter a descriptive title for the assignment.
- In the Assignment description field, enter a detailed description of the assignment to ensure that the assignee is properly informed about the details of the assignment.
- From the Assigned to drop-down menu, select the person to whom this assignment is assigned to.
- Optional: In the Deadline field, select a deadline date by which the assignment must be completed.
- Optional: Via the workflow controls at the bottom of the New Assignment dialog, select a workflow for the assignment.
- Click Create to create the assignment.
- Once the new assignment has been created, right-click the assignment in the listing area and select Add File and choose a suitable file format for the new file.
- Rename the new file accordingly.
- Optional: Double-click the newly added file to edit it.
Completing an Assignment
Once you have been given an assignment, you have to complete the tasks associated with the assignment and mark the assignment complete to indicate that you, the task assignee, have completed the assignment given to you.
Completing an Approval Assignment
Once you have been given an approval assignment, you have to complete the tasks associated with the assignment and mark the assignment either approved or rejected to indicate that you, the task assignee, either approve or reject the target of the assignment. You could mark an assignment rejected, for instance, if you consider the target document to be unpublishable.