
Creating New Objects and Saving Documents to M-Files
Creating new documents or other objects in M-Files, or saving documents from other applications to M-Files, is very simple and straightforward. This quick tutorial shows you how it is done.
Video: Saving Information with Metadata
Creating New Objects in M-Files
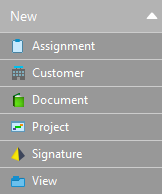
You can create new objects by clicking the Create button, or by clicking the desired button under the Create section in the task area:
-
Either:
- Click the Create (
 )
button and select the desired object type from the context menu.or
)
button and select the desired object type from the context menu.or - In the task area, under the
Create section, click the desired object type.
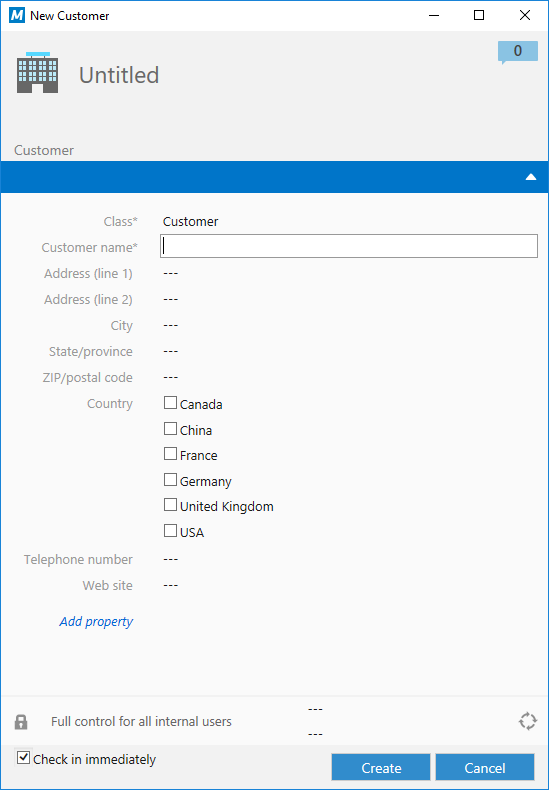
Result:If you chose to create a new document, the New Document dialog is opened. Otherwise the metadata card for the new object is opened. - Click the Create (
-
Fill in the necessary metadata and then click
Create.
Saving Documents to M-Files from Other Applications
M-Files supports all file types and you can save documents from any application to M-Files. Documents are saved to a document vault and then described with metadata. You do not have to save documents into a particular folder or location as M-Files organizes content automatically into relevant views based on document metadata.
Certain applications, such as AutoCAD, Microsoft Word, Microsoft Excel, or Microsoft PowerPoint, have an M-Files ribbon that you can use to easily save new documents to M-Files. If the application you are using does not have the ribbon, you can still use the Save As... function of the application to save your document to M-Files.
Complete the following steps to save a document to M-Files from another application:
-
Either:
-
If you are using an application that is equipped with the M-Files ribbon, open it and then click Save to M-Files. If you have more than one vault connection, select the appropriate vault from the context menu.
 or
or - If the application does not have the Save to M-Files feature, select from the menu bar, select M-Files as the
location, and if necessary, select the appropriate vault. Finally click
Save.
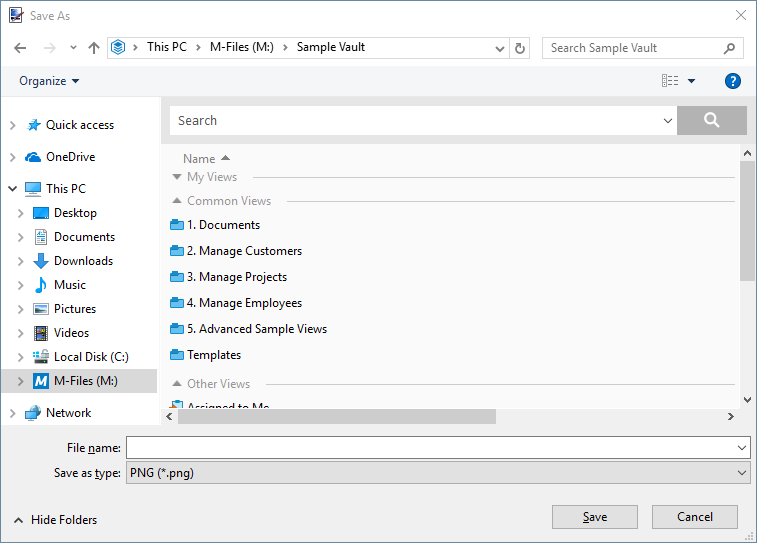
Result:The metadata card for the new document is opened.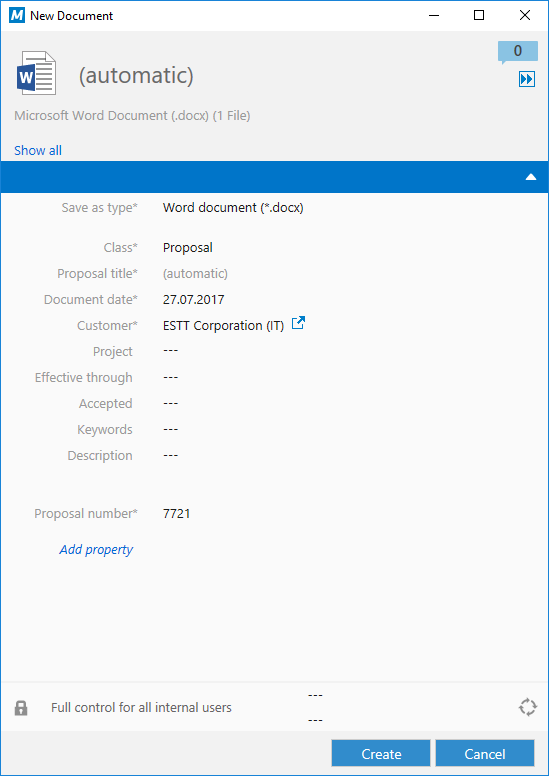
-
For more information on creating objects and saving documents in M-Files, see Adding Content to Vault.
Now that you are up to speed with the ways documents are created and saved to M-Files, proceed to Using Document Templates for a tutorial on how to take advantage of document templates when creating new documents.