Translating the Metadata Structure

Note: This content is no longer updated. For the latest content, please go to the user guide for M-Files Online. For information on the supported product versions, refer to our lifecycle policy.

Using the Languages and Translations dialog, you can export the translatable content of the metadata structure and translate the exported structure in Excel, Word, or a professional translation program, such as SDL Trados or SDL Passolo.

To translate the metadata structure of the vault, follow the steps provided below.

First, you need to open the Languages and Translations dialog.
  1. Open M-Files Admin.
  2. In the left-side tree view, expand a connection to M-Files server.
  3. Select the desired vault.
  4. Open the Action menu and select Languages and Translations.
    Result:The Languages and Translations dialog for the selected vault is displayed.
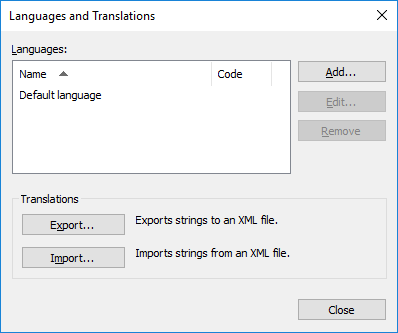
Next, add your language to the list and export the list of terms to an XML or XLIFF file.
  1. Click the Add... button.
    Result:The Language dialog is opened.
  2. In the Name field, enter the language name.
  3. Optional: In the Code field, enter a code of your choice for the language.
    Example:This can be, for instance, an ISO 639-1 code.
  4. Click OK to close the Language dialog.
  5. Select the newly added language from the list.
  6. Click the Export... button.
    Result:The Export Strings dialog is opened.
  7. Define the settings for your language export.
    For more information, see Adding and Exporting Languages.
  8. Define the location for your export file and click Save.
    Result:The export file is saved as an XML or XLIFF file to the location you specified.
Once the export has completed, you can start working on the actual translation.
  1. Open the exported file in the software of your choice and add the translations.
    For instructions on completing the process with Microsoft Excel, see Translating in Microsoft Excel.
The final step is to import the completed translation back to M-Files.
  1. Return to M-Files Admin and repeat the steps from 2 to 4 to open the Languages and Translations dialog.
  2. Click the Import... button.
  3. Select the target language and click Open.
  4. Select whether you want to import all strings or just the ones that have been marked as translated.
    For more information, see Importing Translations.
  5. Click OK.
  6. Once the import is complete, click Close to close the Languages and Translations dialog.
Translations for the newly added language have been imported to M-Files and you can select the vault language in M-Files Desktop.