Graphical workflow designer
You can use the graphical workflow designer in M-Files Admin to create and edit workflows. Open M-Files Admin, select the vault connection and then the vault in the left-side tree view. Finally, click Workflows.
Workspace
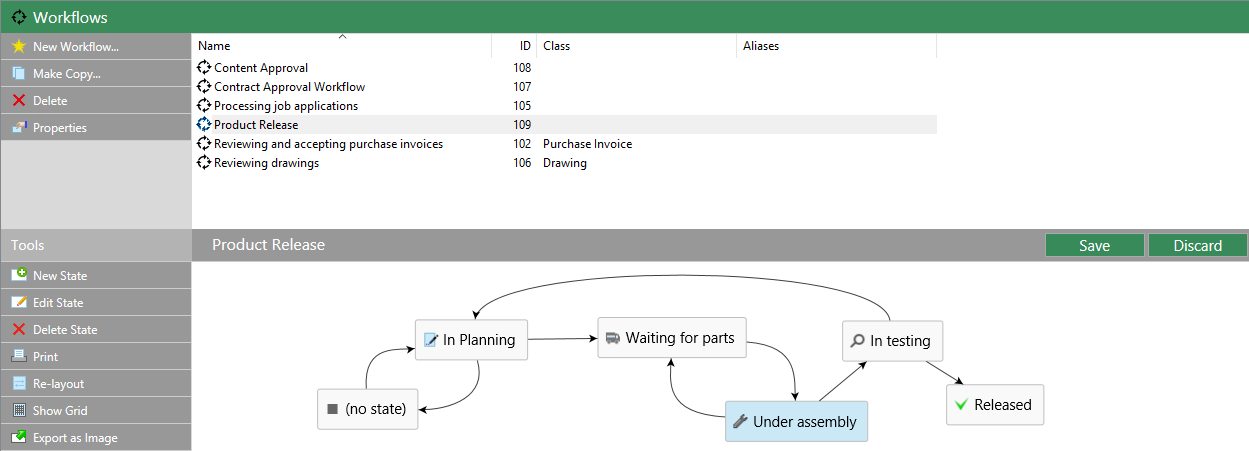
- The top section shows the available workflows and the task area commands New Workflow, Make Copy, Delete and Properties.
- The bottom section shows the graphical workflow designer. See Using the designer and Task pane commands for explanations of the designer-related task area commands.
 The graphical workflow designer in M-Files Admin.
The Save and Discard commands are in the top-right corner of the workspace, on the title bar of the selected workflow. The Save command saves all the changes to the workflow. This includes the layout of your graphical representation.
To change the workspace proportions, drag the workflow title bar up or down.
Using the designer
You can use the task area, the graphical designer area, and context menus.
Creating new states
To create new states, click New State in the task area or double-click an empty space on the canvas. The dialog for a new workflow state opens.
Editing states
- Double-click the state.
- Select the state and click Edit State in the task area.
- Right-click the state and select Edit from the context menu.
- Select the state and press the Delete key.
- Select the state and click Delete State in the task area.
- Right-click the state and select Delete from the context menu.
Editing the layout
Drag and drop the workflow states to move them around on the canvas.
Connectors (state transitions)
Arrow connectors between states show the workflow state transitions. To add connectors between the states, move your cursor on the edge of a state rectangle and use drag and drop. The state rectangle has green edges and the cursor changes into a cross (+) when you can draw a connector.
 A state transition from Testing to Released.
Sometimes the connectors can overlap with each other or with the state rectangles. Edit the connector shape to make the layout easier to read. Select a connector and use the two handles to change the shape of the connector.
You can Edit or Delete the selected state transition from its context menu, and Straighten the connector. Double-click the connector to open the properties dialog for the transition.
Zooming and dragging the canvas
Scroll your mouse to zoom in and out or drag the canvas around. Right-click an empty space on the canvas to reset the zoom level.
Task pane commands
States and state transitions can have context-specific task area commands, for example Edit State and Straighten. The table below shows actions that are common for the designer and your entire workflow:
| Click... | To do this... |
|---|---|
| Re-layout | Arrange workflow components to a default positioning. |
| Show Grid and Hide Grid | Show or hide the grid in the background. |
| Make a paper copy of the workflow. Note: The print function uses the Page
setup settings of Internet Explorer for the page header and footer.
Set the settings for the header and footer to empty if you want to remove them from
the printout. To open the Page setup dialog, for example with Internet Explorer 10, click the tools button in the top-right corner of the browser
and select . |
|
| Export as Image | Export the workflow as a PNG file. When you click Export as Image, the common Windows save dialog for the image file opens. |
Tooltips
Move the cursor over the state rectangles and connectors to see possible tooltips.
Tooltips can contain the element title, description, and information on the state transition conditions and special actions.