
Creating a Document
You can create documents just like before and save them directly to the M-Files drive. You can also create other types of objects, such as customers or assignments. See Creating Non-Document Objects and Creating and Completing Assignments for more information.
Start creating a new document by first clicking the Create button and then selecting Document... from the context menu, or by pressing Ctrl + N in the M-Files user interface. The new document dialog helps you select the right template and class for the new document. Templates can also be searched by typing a search term. The search displays all templates and file formats that match the search criteria, and highlight the results.

The new document creation wizard.
Selecting All displays all templates and file formats that are defined for the vault in question. The Recently Used option shows all the templates you have recently accessed. Recently used templates are also shown by default when you open the template selection wizard. The Blank option shows all the file formats that can be selected for a new document.
These predefined options are followed by a list of classes that can also be used for the template selection. Selecting a class displays the templates that are available for that class.
After you have selected a template or a blank document, a metadata card for the new document opens and you can start editing the properties. Properties marked with an asterisk (*) are mandatory.
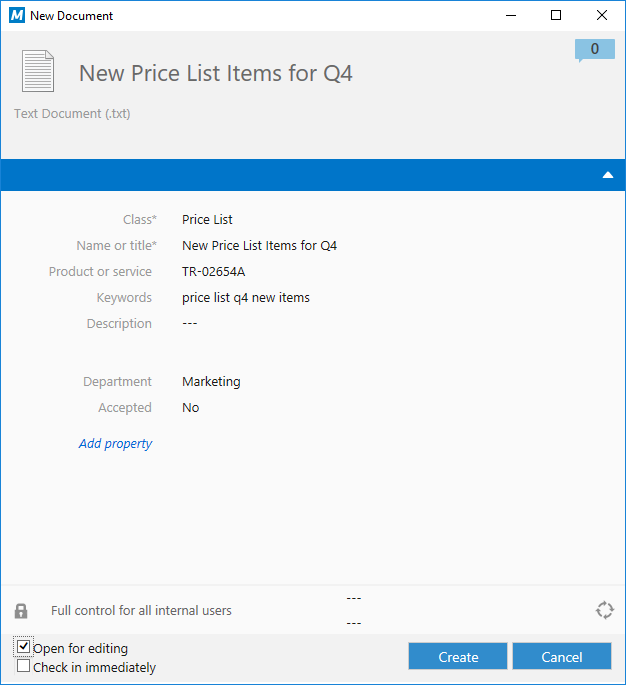
The metadata card of a new document.
Clicking Create saves the document and adds the object to the vault. Selecting Open for editing makes sure that the document is checked out to you for editing until you manually check it in, and opens the new file in a suitable application for editing. If you have selected Check in immediately, the document will be available for others right away. Clicking Cancel discards all the changes and closes the dialog.
When you create a document in some other application, you fill in the metadata card only when you save the document in the document vault on the M-Files drive.
Converting a temporary local file to a document
The Convert to Document operation is available for files that are imported to M-Files with an unusual procedure, for example with command prompt. M-Files shows these temporary local files with a gray icon. To convert a temporary local file to a M-Files document, right-click the file and click Convert to Document.