Note: This content is no longer updated.
For the latest content, please go to the user guide for
M-Files Online. For information on the supported product
versions, refer to our
lifecycle policy.
To use co-authoring in your vault as instructed in Checking Out a Document for Co-Authoring, you first need to enable
Microsoft Office for the web tools and
co-authoring via Microsoft Office for the web in your
vaults.
If you use M-Files Cloud, request our customer support
([email protected]) to enable these features.
If you do not use M-Files Cloud, follow the
instructions in the document Enabling Microsoft Office for the
Web Services for M-Files to get these
results:
If you do not use M-Files Cloud and do not want to set
up Office Online Server in an on-premises environment, your
organization must be a part of Office Cloud Storage Partner
Program. When you are part of the program and have set up your Microsoft Office for the web integration, you must
set M-Files Web to use it (refer to Enabling Microsoft Office for the
Web Services for M-Files).
Note: M-Files Desktop uses M-Files Web in the background for co-authoring. In other words,
although the above-mentioned document discusses M-Files Web only,
the same procedures must be done to enable co-authoring in M-Files Desktop as well.
After you are done with the tasks described in the above-mentioned document, follow
the steps in this section to set up your vault to use Microsoft Office based co-authoring.
-
In M-Files Admin, access the custom
vault data section.
-
Open M-Files Admin.
-
In the left-side tree view, expand an M-Files
server connection.
-
Expand Document Vaults.
-
Expand a vault.
-
Click Configurations.
-
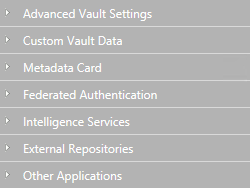
In the navigation area, expand Custom Vault
Data.
-
Select .
-
Expand the Namespaces node, click
Add Namespace, and expand the newly
added namespace node.
-
In the Group field, type a suitable group
name, such as Co-authoring.
-
Use the Storage Type drop-down menu to
select the MFConfigurationValue
storage.
-
In the Namespace field, enter the
following value: M-Files.Core.CoAuthoring.Configuration
-
In the Namespace Label field, type a
suitable label, such as Co-authoring.
-
In the Namespace Description field, enter
for example Settings related to co-authoring.
-
Click Save to save the namespace
settings.
-
In the gray navigation area, expand Named
Values.
-
Expand the namespace group you just created, then select the namespace node,
and finally the Configuration node.
-
Click Add Named Value, and expand the
newly created named value node.
-
In the Name field, enter the value WOPI.
-
In the Value field, enter the
co-authoring configuration according to the values explained in the table below
and the example given below the table.
| Name |
Description |
Example value |
| WopiRESTServer |
The address of the server hosting M-Files Server and M-Files Web. M-Files Desktop
communicates with this server via REST for starting the co-authoring
process, as well as for opening the page hosting the Office Online editor.
If your environment uses Multi-Server Mode, use a vault DNS name that the load balancer
recognizes. For example: customer1.cloudvault.m-files.com. |
myserver.mycompany.com |
| WopiRESTServerFolder |
The REST server folder. This should be set to /REST/ in most cases. |
/REST/ |
| UrlSrc |
The REST endpoint of M-Files Web communicating
with Office Online Server. The value is entered in the following
format: https://<your M-Files Web server
address>
If your environment uses Multi-Server Mode, use a vault DNS name that the load balancer
recognizes.
For example: https://customer1.cloudvault.m-files.com.
|
https://myserver.mycompany.com/ |
| MainAppURL |
A confirmation page is opened based on this URL after the user
closes the co-authoring page. If your environment uses Multi-Server Mode, use a vault DNS name that the load balancer
recognizes.
For example: https://customer1.cloudvault.m-files.com. |
https://myserver.mycompany.com/ |
| UseHttps |
Specifies whether HTTPS is used for communication. This should
be set to true in most cases. Note: The value
must not contain quotation marks. |
true |
| WopiServerPort |
The port used for REST requests. This should be set to 443 in most cases. |
443 |
| OperationTimeoutInMs |
Specifies in milliseconds the time that M-Files Desktop should wait for Microsoft Office operations to complete. If
exceeded, M-Files gives up and shows a
timeout error. This is an optional setting, and if it is not
included in the configuration at all, the default timeout of 10
seconds is used. |
10000 |
The configuration should be entered in the same format as the example
below:
{
   "WopiRESTServer": "myserver.mycompany.com",
   "WopiRESTServerFolder": "/REST/",
   "UrlSrc": "https://myserver.mycompany.com/",
   "MainAppURL": "https://myserver.mycompany.com/",
   "UseHttps": true,
   "WopiServerPort": 443,
   "OperationTimeoutInMs": 10000
}
-
Click Save to save the
configuration.
-
Use Windows Task Manager to restart the MFServer service:
-
Right-click the taskbar and select Task
Manager.
Result:The Task Manager window is
opened.
-
Open the Services tab.
-
Right-click the MFServer service and select
Restart.
The integration with Microsoft Office for the web is now in
use in the vault. End users can check out documents for co-authoring as instructed in
Checking Out a Document for Co-Authoring as soon as they have
logged out from and logged back in to the vault. You can
log out all vault users by restarting the vault, but taking a vault offline should
always be done in a controlled manner and the vault users should be
notified beforehand.

